
We’re excited to launch our first version of Self-Tape requests on the Spotlight platform. There will be more improvements to come and your feedback will be invaluable to getting these tools to where they need to be.
Please see a step by step guide and accompanying videos below.
How to Request a Self-Tape on Spotlight
-
- Navigate to your active breakdown.
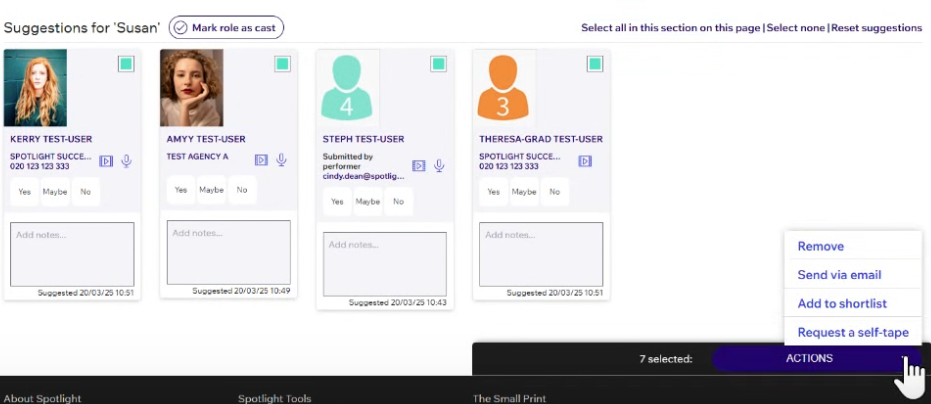
- Click on the ‘View Suggestions’ page to see the suggestions submitted by agents or performers.
- Select the performers you are interested in by clicking on their headshots to highlight them in green.
- Once performers are selected, the footer options at the bottom of the page will become available.
- Click on the ‘Request a self-tape’ action
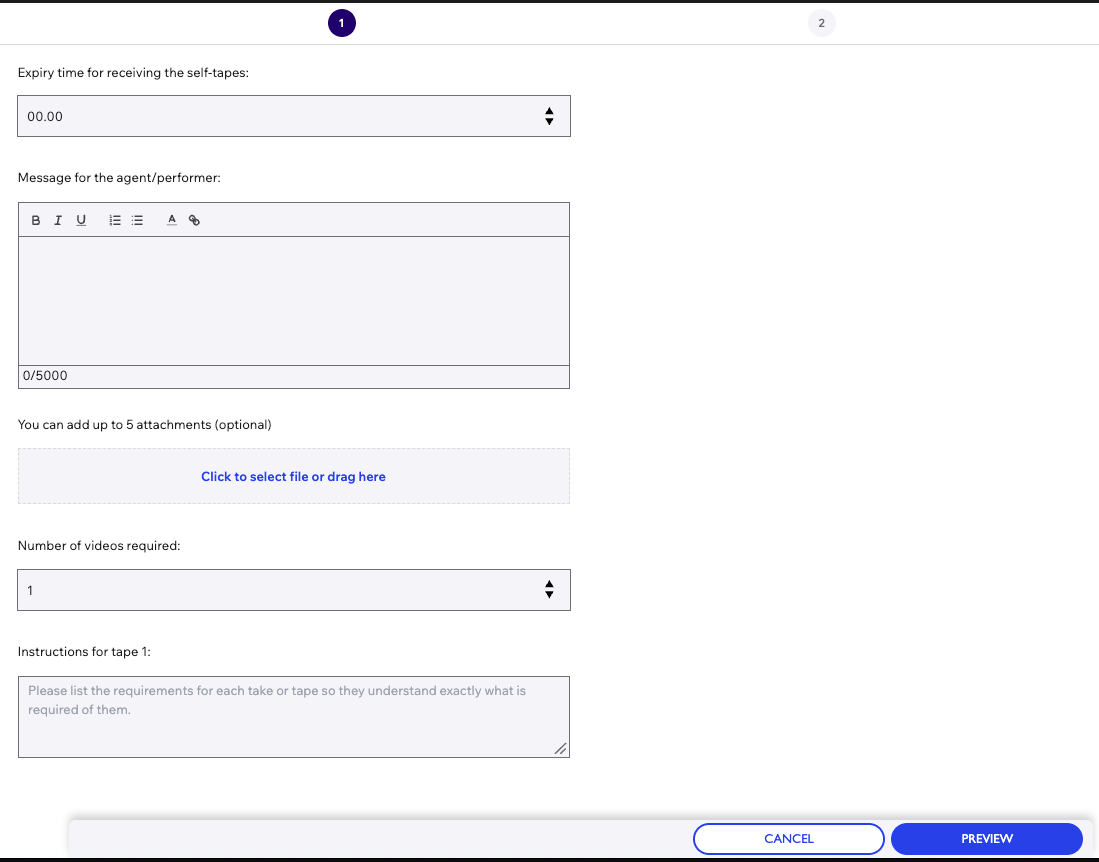
- The request forms are divided by role (if you’re requesting tapes across multiple roles on your breakdown). Fill out a separate form for each role you are requesting a self-tape for.
- Enter details for each role:
- The date by which you’d like to receive the self-tape.
- The time by which you’d like to receive the self-tape (e.g., close of business).
- Leave a message for the performer or the agent.
- Attach your script or any other files or sides necessary for the self-tape.
- Indicate how many tapes you would like to receive (options include 1, 2, 3, 4, 5, or any), and instructions for each tape, if relevant.
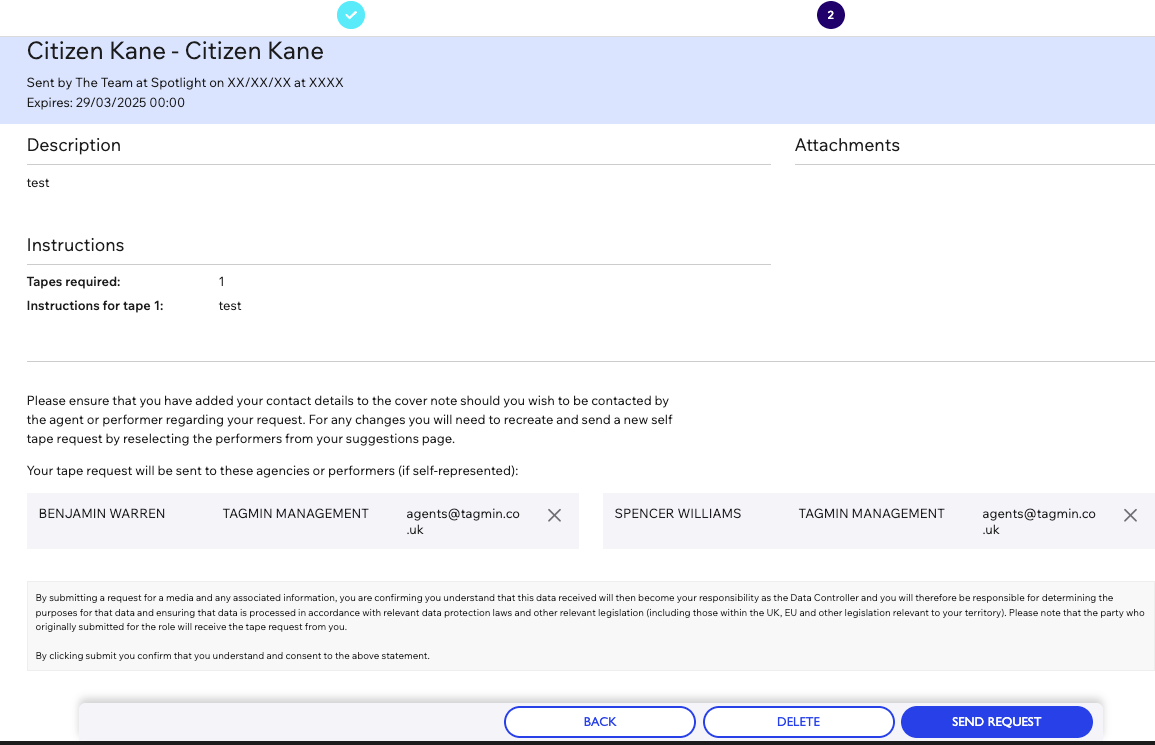
- On the preview page, you can review your request. If you need to make changes or have made a mistake: Remove a request by clicking on the ‘X’ icon.
- Once everything is correct, click on the ‘Send Request’ button. The request will go to the person who made the suggestions.
Repeat the Process for Additional Roles
- For additional roles, go back to the suggestions page and repeat the process. Fill in the same details as before.
- After sending each request, you should see a confirmation message indicating that the tape request has been sent.
By following these steps, you will have successfully requested self-tapes from performers for your project on Spotlight.
Receiving and Sharing Self-Tapes
Access Tape Requests
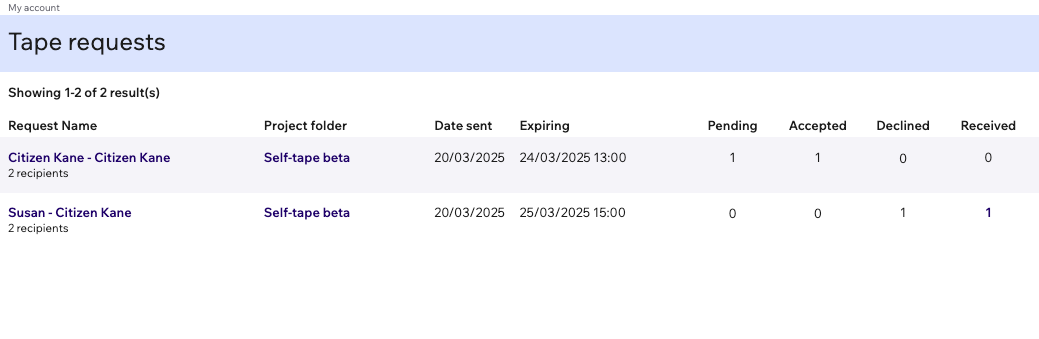
- To view the self-tape requests you have made, click on ‘Tape Requests’ on the left hand menu.
Review Request Statuses
- On the tape request page, you can see the list of each status: Pending, Accepted, Declined, and Received.
- Click on the number next to each status to view the specific tapes under that category.
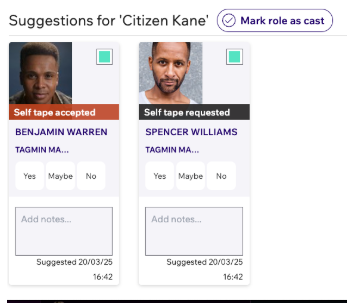
View Suggestions and Statuses
- You can alternatively go back and click on your active breakdown, then click on ‘View Suggestions’ to see the different statuses:
- ‘Received’ will be shown in green.
- ‘Requested’ will be shown in black.
- No status indicates no request has been made or a submission came in since the last check.
- ‘Accepted’ will be shown in orange.
- ‘Declined’ will be shown in red.
View Videos
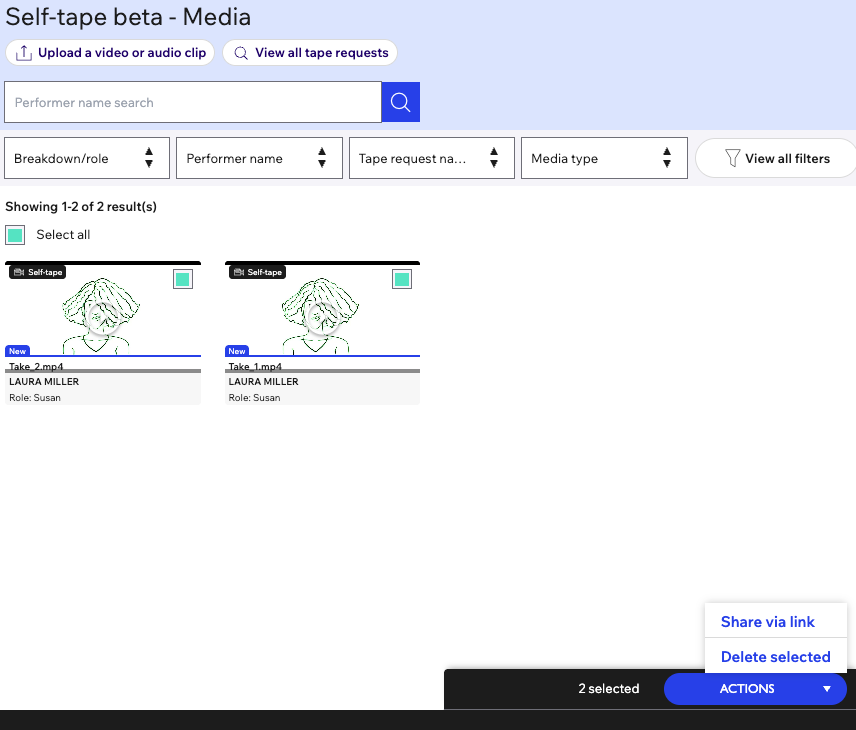
- At the top of the page, you can click on ‘View Videos’ to be directed to your media tab, where you can see the self-tapes you have received.
Select Tapes to Share
- To share some of the audition tapes, select them by marking them in green.
Share via Link
- Click on ‘Share via Link’ from the actions at the bottom of the page.
Label Your Link
- You need to label your link before sharing it with your director, producer, or creative team.
Set Link Expiry Date
- Set the link expiry date, which can be changed at any point.
Manage Tapes
- The tapes are linked to the actor’s profile, and you can add notes if required.
- You can reorder the tapes or delete any of them at this stage.
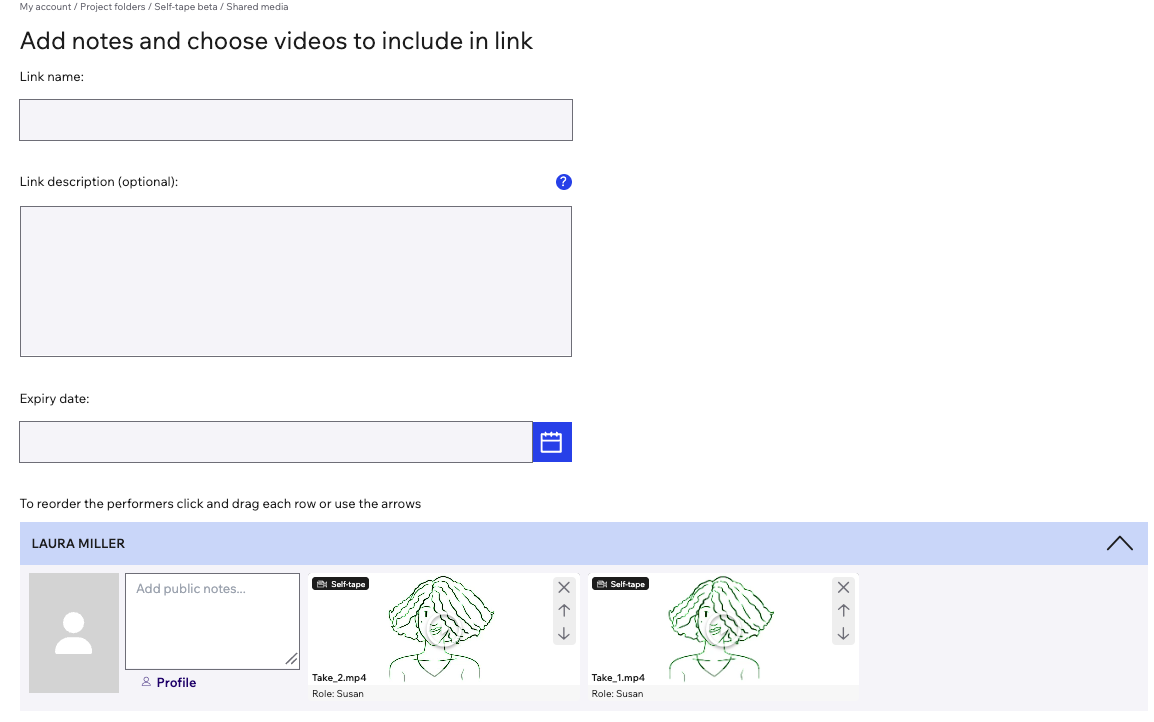
Submit and Create Link
- Click on ‘Submit’ to create your shareable link.
- Manage Your Link
- Once the link is created, you can:
- Copy the link to share it.
- Edit the link or the expiry date.
- Deactivate the link, which will close it.
- View the public link.
- Delete the link if necessary.
By following these steps, you will be able to effectively manage and share the self-tape auditions you have received for your project through Spotlight.
If you run into any issues, please contact our team at casting@spotlight.com. If you want to provide any general feedback on the tools, you are welcome to fill out this form.