We are excited to launch our first version of Self-Tape requests on the Spotlight platform. We’re initially rolling out this functionality to a select group of casting directors in a beta phase. This allows us to gather feedback and ensure a smooth, reliable experience for everyone.
Please see a step by step guide and accompanying videos below. As a Tagmin agent, you will have additional functionality available to you.
Contents
- Step 1: Copying other agents and the main agency email address into your self-tape requests on Spotlight
- Step 2: Receiving a Self-Tape Request, check your Tagmin account!
- Step 3: Communicating with your Client
- Step 4: Uploading and Submitting your Tape
- Did You Know? – Additional Options As An Agency on Spotlight
Step 1: Copying other agents and the main agency email address into your self-tape requests on Spotlight
Currently, self-tape requests only go to the account where the submission for the job was made. However, It may be important, depending on how your agency operates, to copy other users at the agency into your requests so that you can collaborate or cover each other’s work.
- To do this, click on Account Settings from your left hand menu
- Scroll down to the ‘Tape Request Notification Settings’ section.
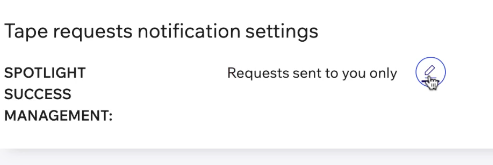
- By default, tape requests are sent only to your feed. If you wish to share tape requests with other accounts within the agency, you can adjust the settings to allow multiple accounts to see and respond to these requests on your behalf within Spotlight.
- Once this is in operation: to check whether a project was submitted by you or another agent, you can access your feed, click into the tape request, and find the name of the agent who made the submission.
- In the ‘Tape Request Notification Settings’, you will also find the option to send duplicate tape request email notifications to the main contact email address associated with your agency, as well as your own email address. This main contact email is the one that appears on client profiles across the agency. Please be aware that this function is just for notification purposes.
By following these steps, you can configure your agency’s settings on Spotlight to ensure the right members of your team are notified about self-tape requests and have the ability to manage them accordingly.
Regardless of your Spotlight settings, the tape request will arrive in your Tagmin account, based on which clients you view in your Daybook settings.
Step 2: Receiving a Self-Tape Request, check your Tagmin account!
- When your client is selected to submit a self-tape for a project on Spotlight, you will receive a notification by email and the request will populate within your Spotlight and Tagmin account.
- Navigate to the dedicated ‘Spotlight requests’ tab in Tagmin.
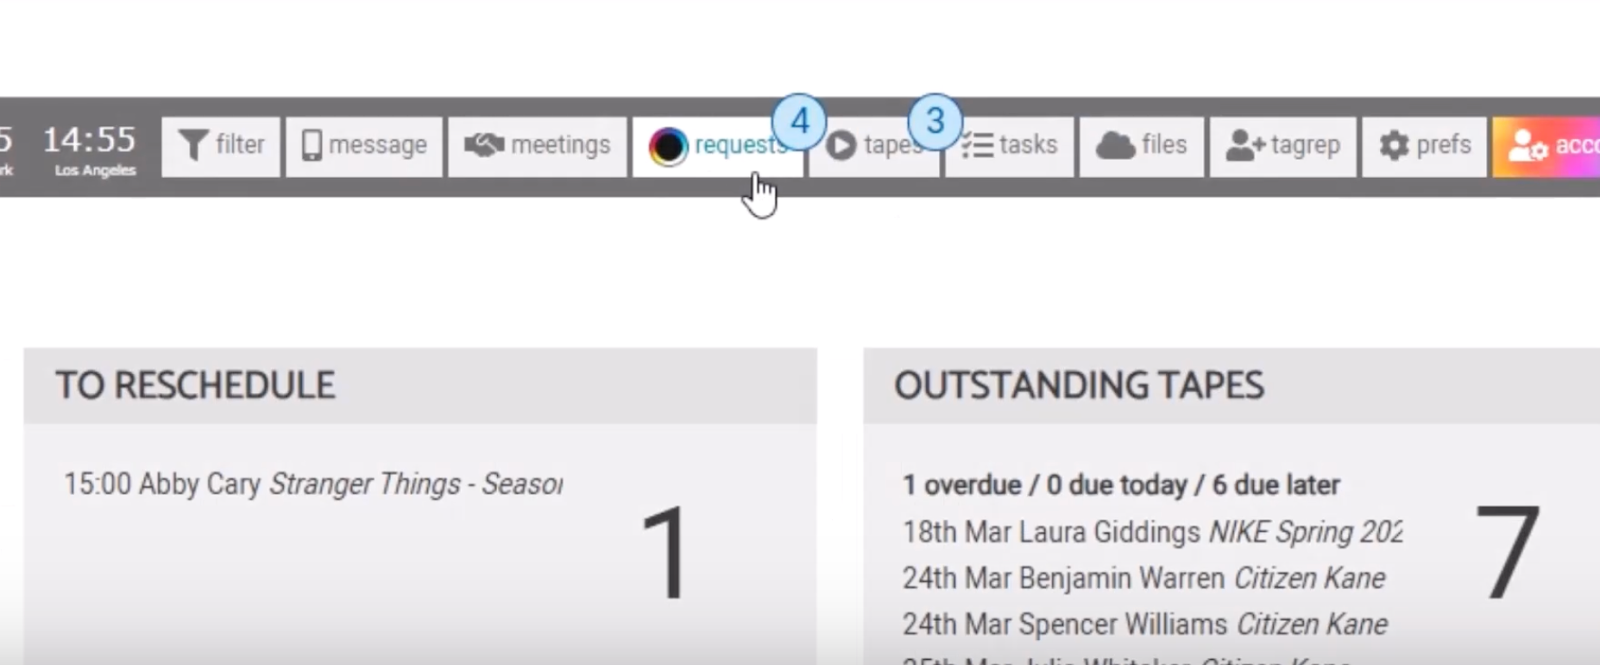
- Review the number of tape requests indicated by the icon in Tagmin (e.g., 4 tape requests).
- The tape request from Spotlight should be automatically delivered and pre-filled in Tagmin, eliminating the need to import the original submission.
- Check and edit the booking details in Tagmin, if necessary. For instance, you may want to request the self-tape from your client earlier than the casting director’s deadline to review and approve it first.

- View the deadline for the self-tape submission to understand how much time your client has.
- Attachments should be automatically imported into Tagmin. Download and view them if necessary.
Step 3: Communicating with your Client
- Email the tape request to your client through Tagmin, with the attachments automatically included.
- Tagmin will update the status of the tape to indicate that you’re waiting for your client’s confirmation to proceed with the tape.
- You can use Spotlight to accept or reject tape requests, fully integrated with Tagmin.
- Once your client accepts the tape request, update the status on Tagmin or Spotlight accordingly, in both cases, the requests will sync between our systems.
Step 4: Uploading and Submitting your Tape
- If you do not use TagTapes, you can collect the self-tapes from your clients manually and upload them via Spotlight, or forward the request to your client for direct upload to the casting director without agent approval.
For agents using TagTapes
- You can collect all self-tapes in the main Tapes tab, regardless of their destination (Spotlight, CastIt, Dropbox etc).
- Review the uploaded tape from your client, edit the order of scenes or hide clips if necessary.
- When you’re ready to submit your tapes select ‘Submit to Casting Director
![]()
- Drag and drop the selected and approved tapes onto the “tapes to submit” area, considering the casting director’s request for a specific number of tapes.
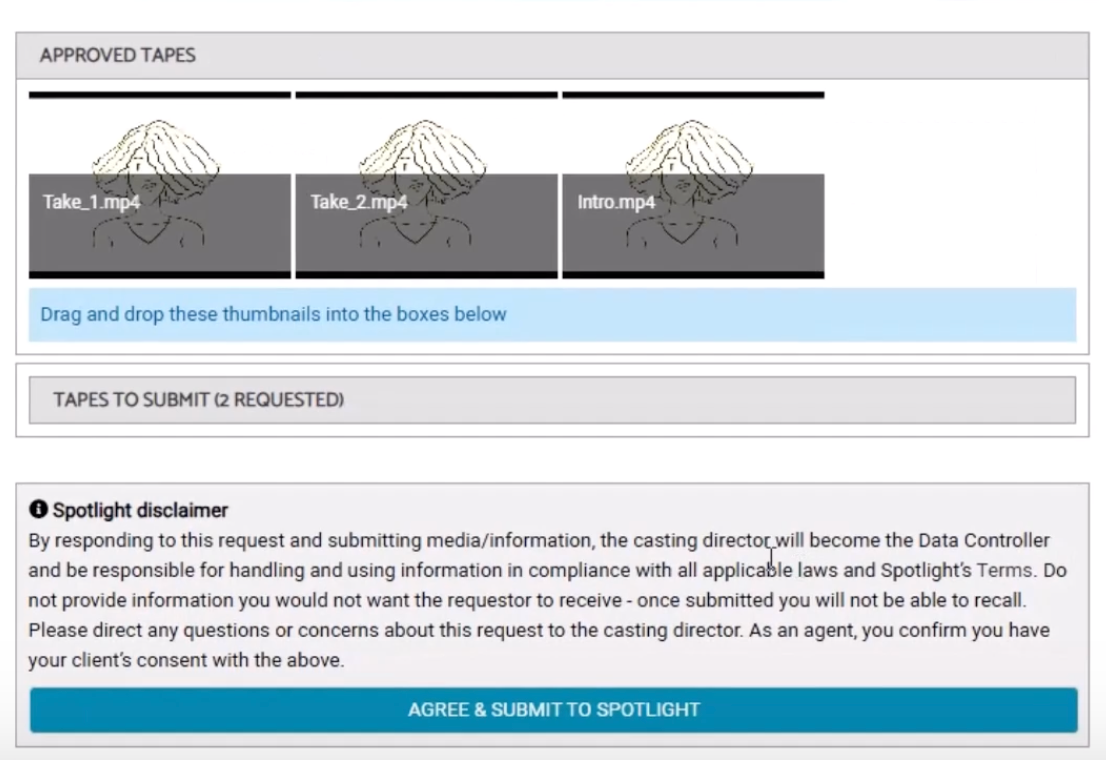
- If needed, review the tapes by clicking to play and edit the file names, there is no need to add the actor’s name as this appears automatically on Spotlight.
- When ready, click the “agree and submit” button to send your self-tapes to the casting director.
- To check If you need to review the submitted tapes, click the button to open the tape request within Spotlight and see the files there.
- Remember that all TagTapes are stored in your Tagmin account. You can share a live streaming link if you miss the deadline and need to email the file to the casting director.
Video File Formats:
Currently, there are no specific restrictions on file size, but the number of tapes that can be submitted per performer is limited based on the request.
File formats accepted:
- MP4
- MOV
- WEBM
- MKV
- AVI
- MPEG
- WMV
- 3GP
- 3G2
For more useful resources on how Tagmin integrates with Spotlight for Self-Tapes and for more info on TagTapes, check out Self Tapes Simplified.
Did You Know? – Additional Options As An Agency
We would continue to encourage you to set up individual users for everyone working at the agency for the following benefits:
- Error Prevention: Individual sign-ins reduce technical errors
- Client List Management: In the near future, each user will be able to have individual client lists (this is optional, and not a requirement)
To help with this, we’ve introduced the following feature:
- Shared Read Job Automation:
- Designed with smaller agencies and co-ops in mind, we introduced a new option which will appear for the admin user under ‘Agency Details‘ from your left hand menu, where you’ll see ‘Jobs Feed Settings‘. Turning the read/unread state option on will allow one team member’s action of marking a job as read to apply to everyone. It’s a great way to sync your team’s progress if you use read jobs as a flag for completed work, but remember, this feature is optional and can be toggled on or off to fit your workflow.
- This works from the moment you click the button so there may be a slight tidy up needed for previous read breakdowns but from the moment the option is ticked any read/unread breakdowns will be shared across all users at the agency.
- We’d suggest only using this feature if your agency normally uses read breakdowns as bookmarks in completed work.
- How to Add New Users / Log In Credentials to an Agency
- Sign in as an Admin User
- Go to ‘Account Settings’ from the left-hand menu
- Click ‘Agency Details’
- Choose your agency then click ‘Add new user’ at the top of the page
- Enter the agent’s email address and click ‘Send Invite’
If you run into any issues, please contact our team at questions@spotlight.com. If you want to provide any general feedback on the tools, you are welcome to fill out this form.